


The kit can be quite daunting if you’re unsure how to use it, so we’ve put together a handy step-by-step guide to show you how simple it is to get your headlights looking their best.
.png)
Shop our range of headlight restoration kits here.
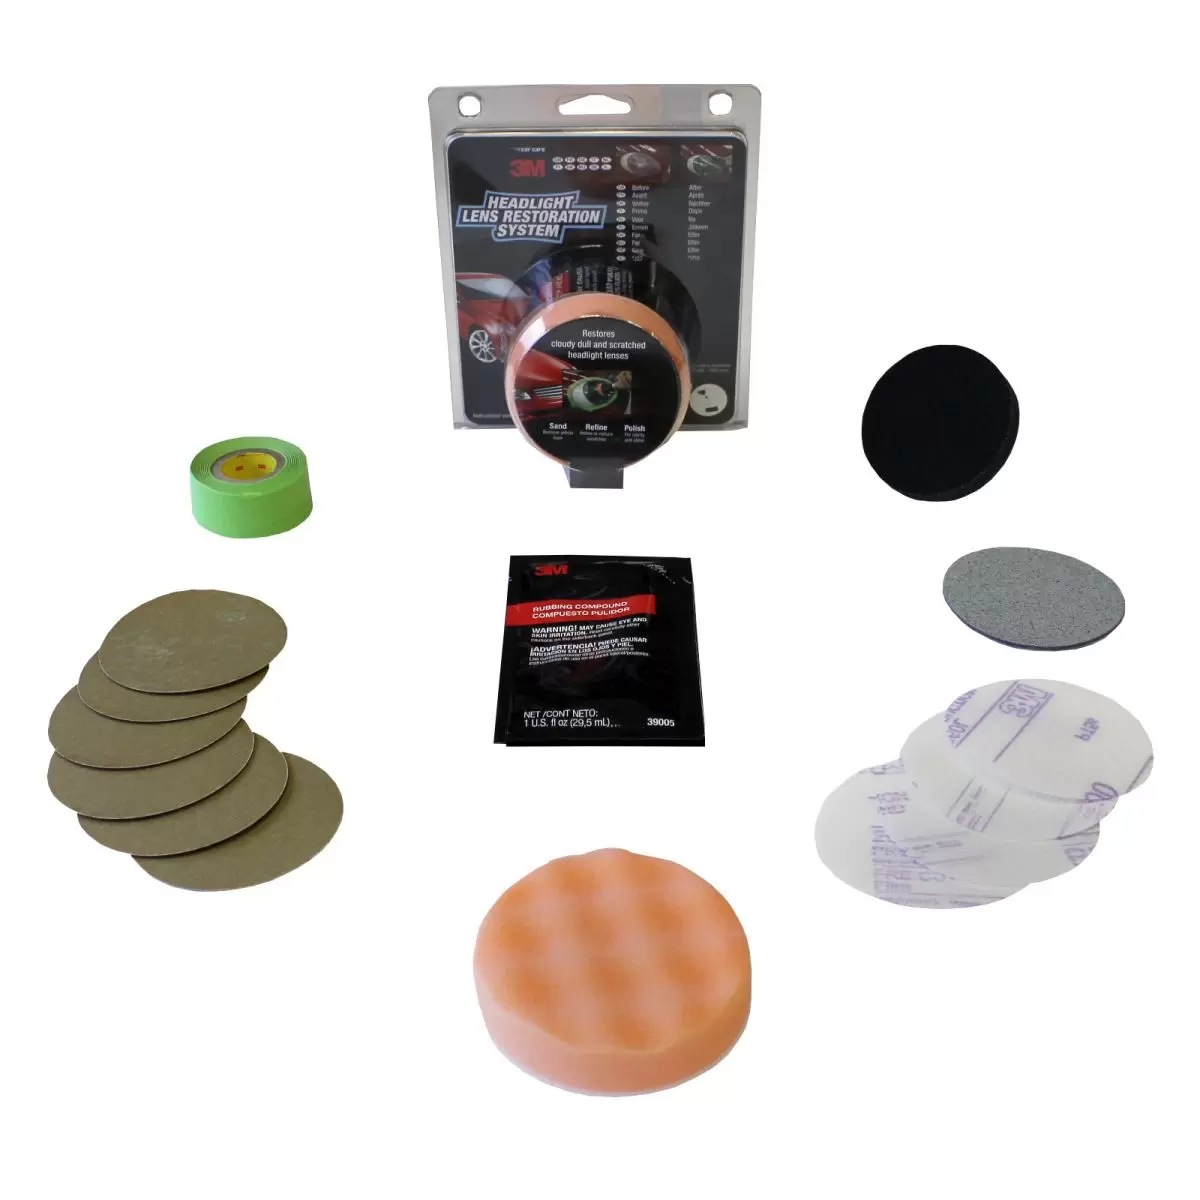
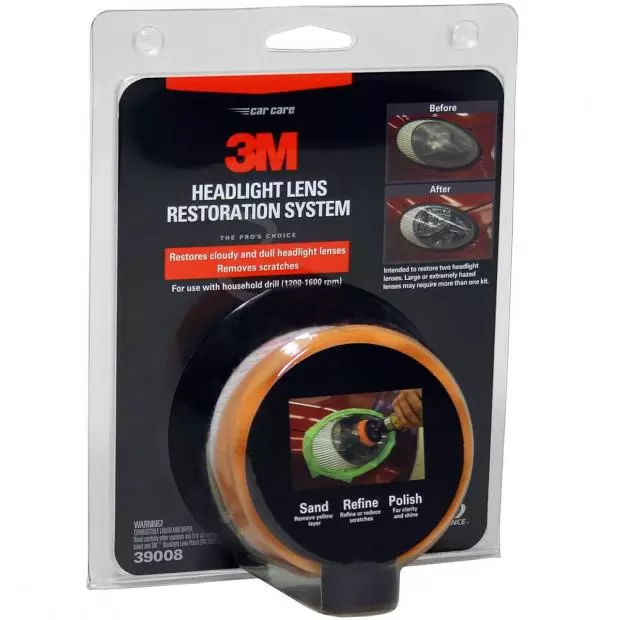
The 3M Headlight Restoration Kit includes:
- 3M Automotive Masking Tape
- 3M Rubbing Compound sachet
- Back-up Pad
- Six P500 grit gold Abrasive Discs
- Four P800 grit Abrasive Discs
- One P3000 grit Abrasive Disc
- Orange foam compounding pad
You’ll also need (not included in the kit):
- Protective eyewear, gloves and dust mask
- A spray bottle filled with water
- A household drill (1200 – 1600rpm)
-
A detailing cloth for a final polish of the headlights
Step One: Preparation
Wash the headlight lens with soap and water to get them squeaky clean. Once dry, use the Automotive Masking Tape to tape the area around your headlight. Mount the disc pad holder into
 the drill and attach one of the P500 grit Abrasive Discs to the holder. If you’re unsure which disc is which, the P500 is a gold colour.
Use a light to medium pressure to begin sanding the headlight to remove the yellow haze and any other surface defects. We advise you sand steadily back and forth, and to not use excessive pressure, as this can damage the surface of the lens (you don't want it to look worse than before!). If the disc becomes clogged or no longer works effectively, you can replace it with another one. You can also wipe the lens with a paper towel to minimise clogging if needed.
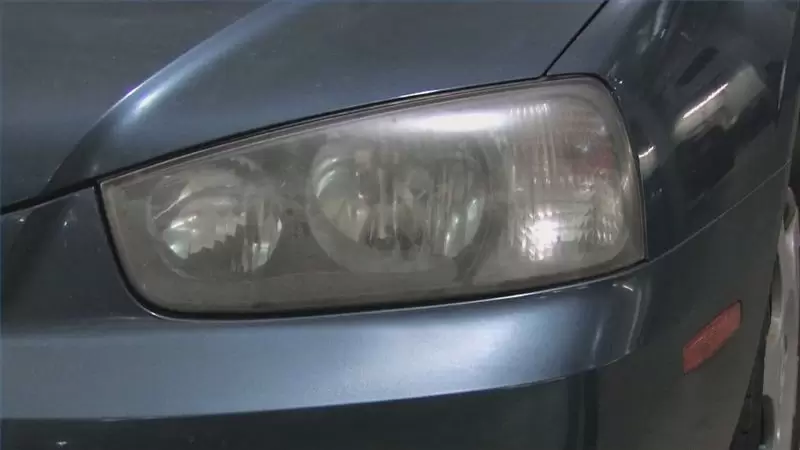
Wipe the lens again and take a good look for any leftover yellow spots or other defects, and sand again to remove these. You’re looking for a lens that has a white, evenly sanded surface with a “frosted” effect. No part of the lens should look clear or glossy – if it does, simply sand until “frosty”.
Remember not to panic at this stage. Your headlight lens is supposed to look cloudy at this point, but will become clear and shiny again in no time!
Step Two: Reducing Sand Scratches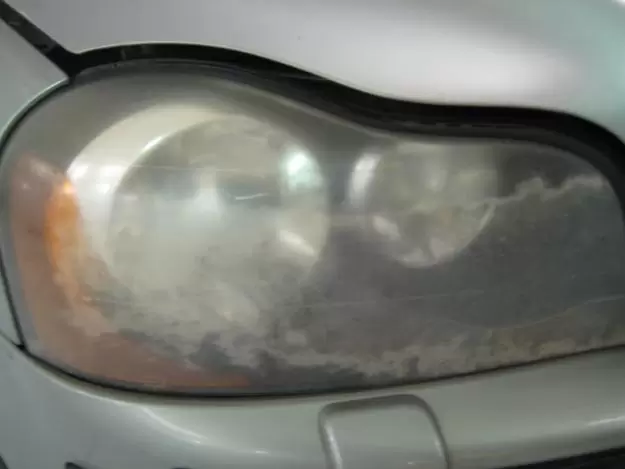
Time for more sanding! Replace the P500 disc with the P800 (the white one) on the Disc Pad Holder. Use the same technique as before to sand the lens.
Wipe the lens and check the scratches. You’re aiming to get them finer than before.
Once this step is complete, take off the P800 disc and put on the P3000 Trizact Foam Disc. Use the spray bottle and water to dampen both the disc and lens surface, then sand as normal to reduce the scratches further. Make sure the lens is sprayed regularly with a mist of water to keep it from becoming too dry. On most lenses, a white residue will appear. Once this appears, continue for 4-6 passes over the headlight. If you don’t see the white residue, aim for 10-12 passes.
Wipe the lens again to check the scratches. If there are still some tricky coarse ones, mist the lens with more water, and sand again.
Step Three: Polishing the Lens
Take off the sanding disc and attach the orange foam compounding pad to the disc pad holder. Dispense a small amount of the 3M Rubbing Compound onto the foam pad. Rub this all around the lens BEFORE switching the drill on, to avoid any mess. Using a similar technique as you did with the sanding, switch the drill on and polish the lens until the clarity improves and the cloudy haze disappears. If extra sparkle is needed, you can apply more Rubbing Compound to the lens.
And that’s it! Your headlight lenses should look bright and shiny, and, more importantly, the quality of your light output on the road should improve.
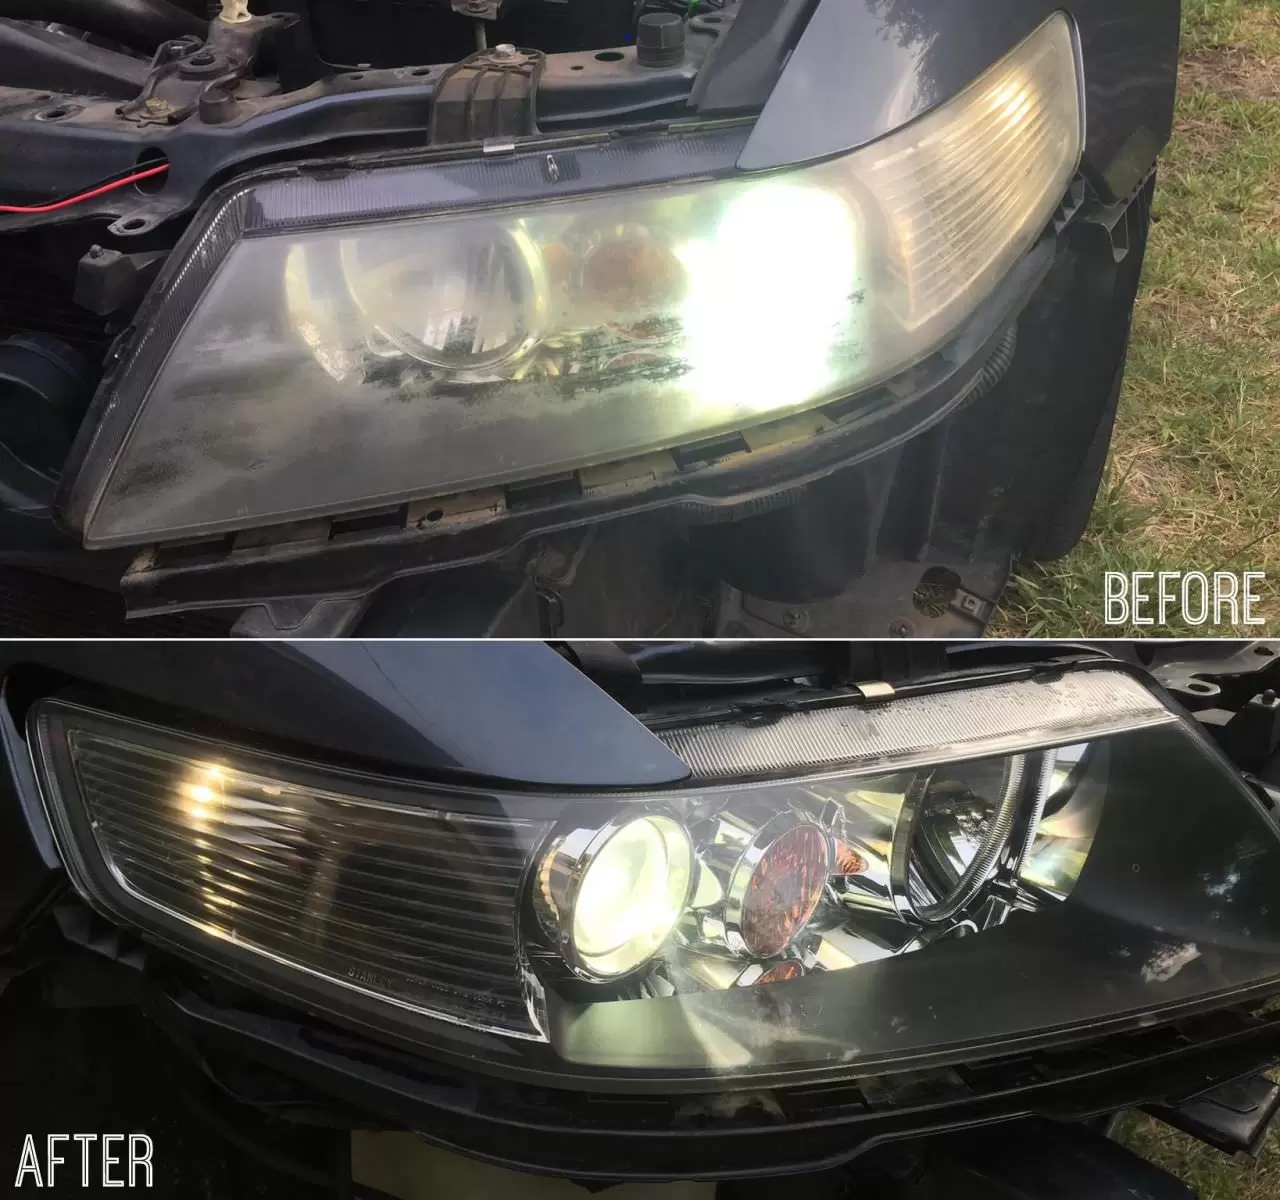
PowerBulbs customer Dale sent us a before and after shot using the 3M kit. Check out his amazing results:
You can also take a look at this video from 3M to see the Headlight Restoration Kit in action:
If your plastic headlight lenses are in need of some TLC, you can shop the 3M Headlight Restoration Kit at PowerBulbs.
.jpg)


 Close
Close